
For many drivers, opening the hood of a car can feel like entering a foreign territory. However, there is one maintenance task that is simple, quick, and absolutely vital for your vehicle’s health: checking the engine oil.
Think of engine oil as the lifeblood of your car. It lubricates moving parts to reduce friction, cools the engine by dissipating heat, and cleans internal components by suspending dirt and metal particles. Neglecting it can lead to overheating, increased wear, or even catastrophic engine failure.
Here at 234Drive, we believe in empowering drivers. Whether you are a novice or a seasoned pro, knowing how to check your car’s oil is a fundamental skill that can save you from costly repairs down the road.
Why Is Checking Your Oil So Important?
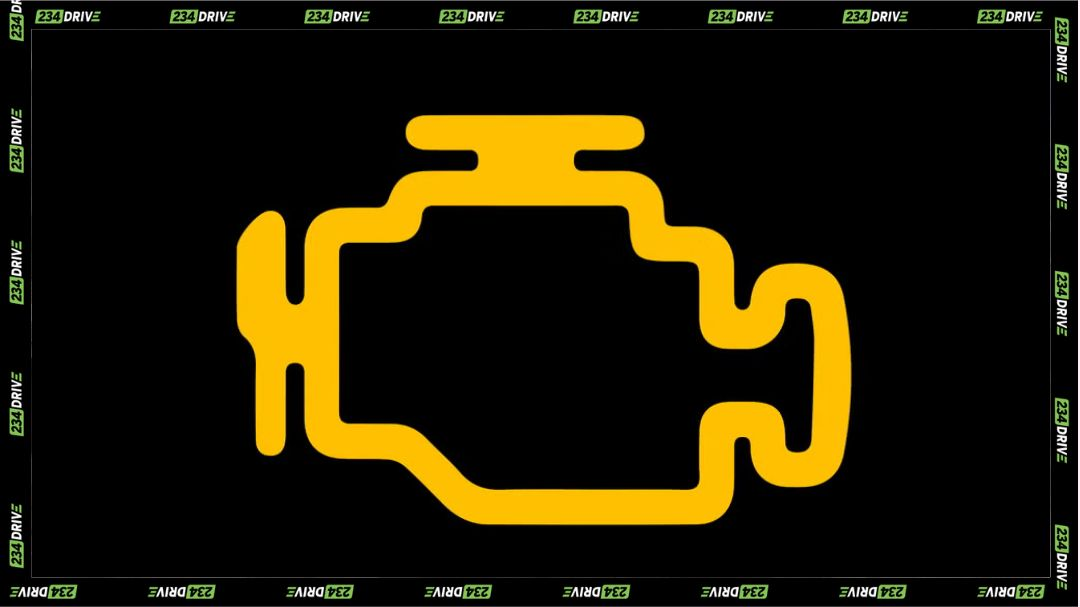
You might rely on your dashboard light to tell you when something is wrong, but by the time the oil pressure light comes on, damage may have already occurred. Regular checks allow you to monitor consumption patterns and catch leaks early.
Engine oil acts as a barrier between metal parts. Without it, friction creates immense heat. Expert research highlights why checking your engine oil is so important: maintaining proper levels extends engine life, improves fuel efficiency, and prevents sludge buildup. For older vehicles nearing the 100,000-mile mark, engines may naturally burn small amounts of oil, making these checks even more critical.
Step-by-Step Guide: The Dipstick Method
For most vehicles, the traditional dipstick method is the standard way to check levels. It requires no special tools—just a clean rag or paper towel and a few minutes of your time. Here is how to check your oil like a pro:
1. Preparation and Safety
Park your vehicle on level ground. This is crucial because if the car is on a slope, the oil will pool at one end of the pan, giving you an inaccurate reading. Engage the parking brake and turn off the engine.
- Tip: If you have been driving, wait 10–15 minutes. This allows the oil to settle back into the oil pan and cools the engine slightly to prevent burns.
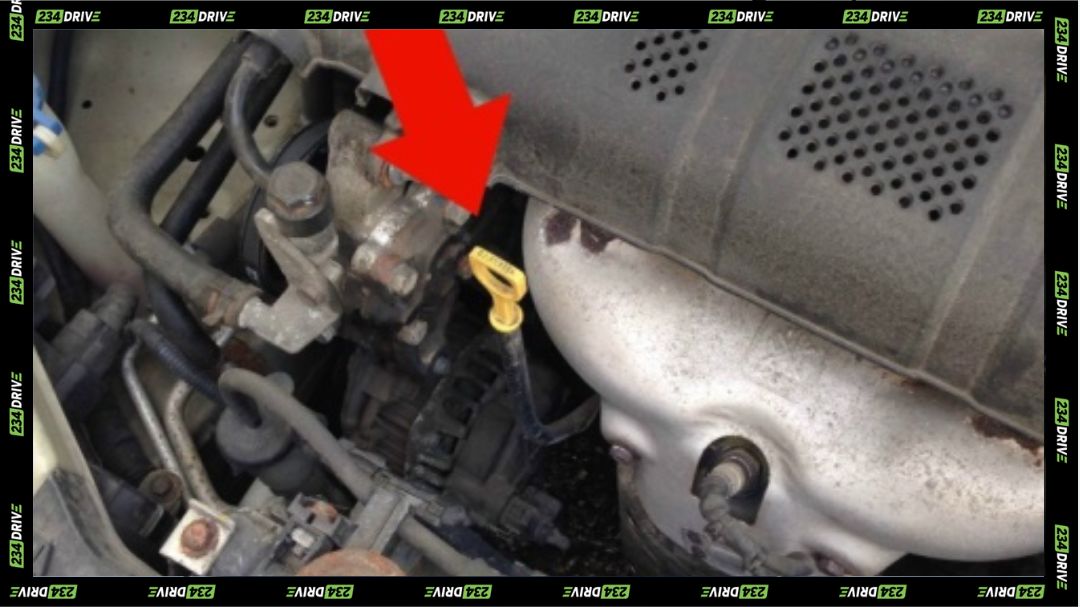
2. Locate the Dipstick
Pop the hood and look for the dipstick. It typically has a handle that is looped or T-shaped and is often coloured yellow, orange, or red for high visibility. It may even have an oil-can symbol on it.
3. The “Pull, Wipe, Dip” Technique
To check your car’s engine oil the right way, follow this sequence:
- Pull: Remove the dipstick completely.
- Wipe: The first reading is useless because oil splashes around while driving. Wipe the metal stick clean with your rag.
- Dip: Insert the dipstick all the way back into the tube until it seats fully.
- Read: Pull it out again and look at the tip.
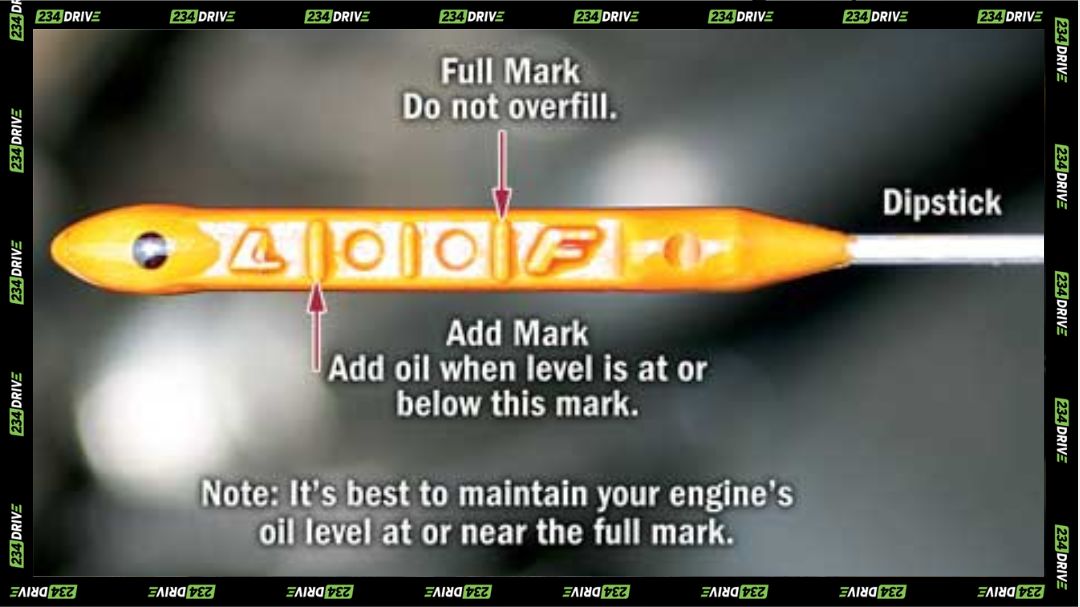
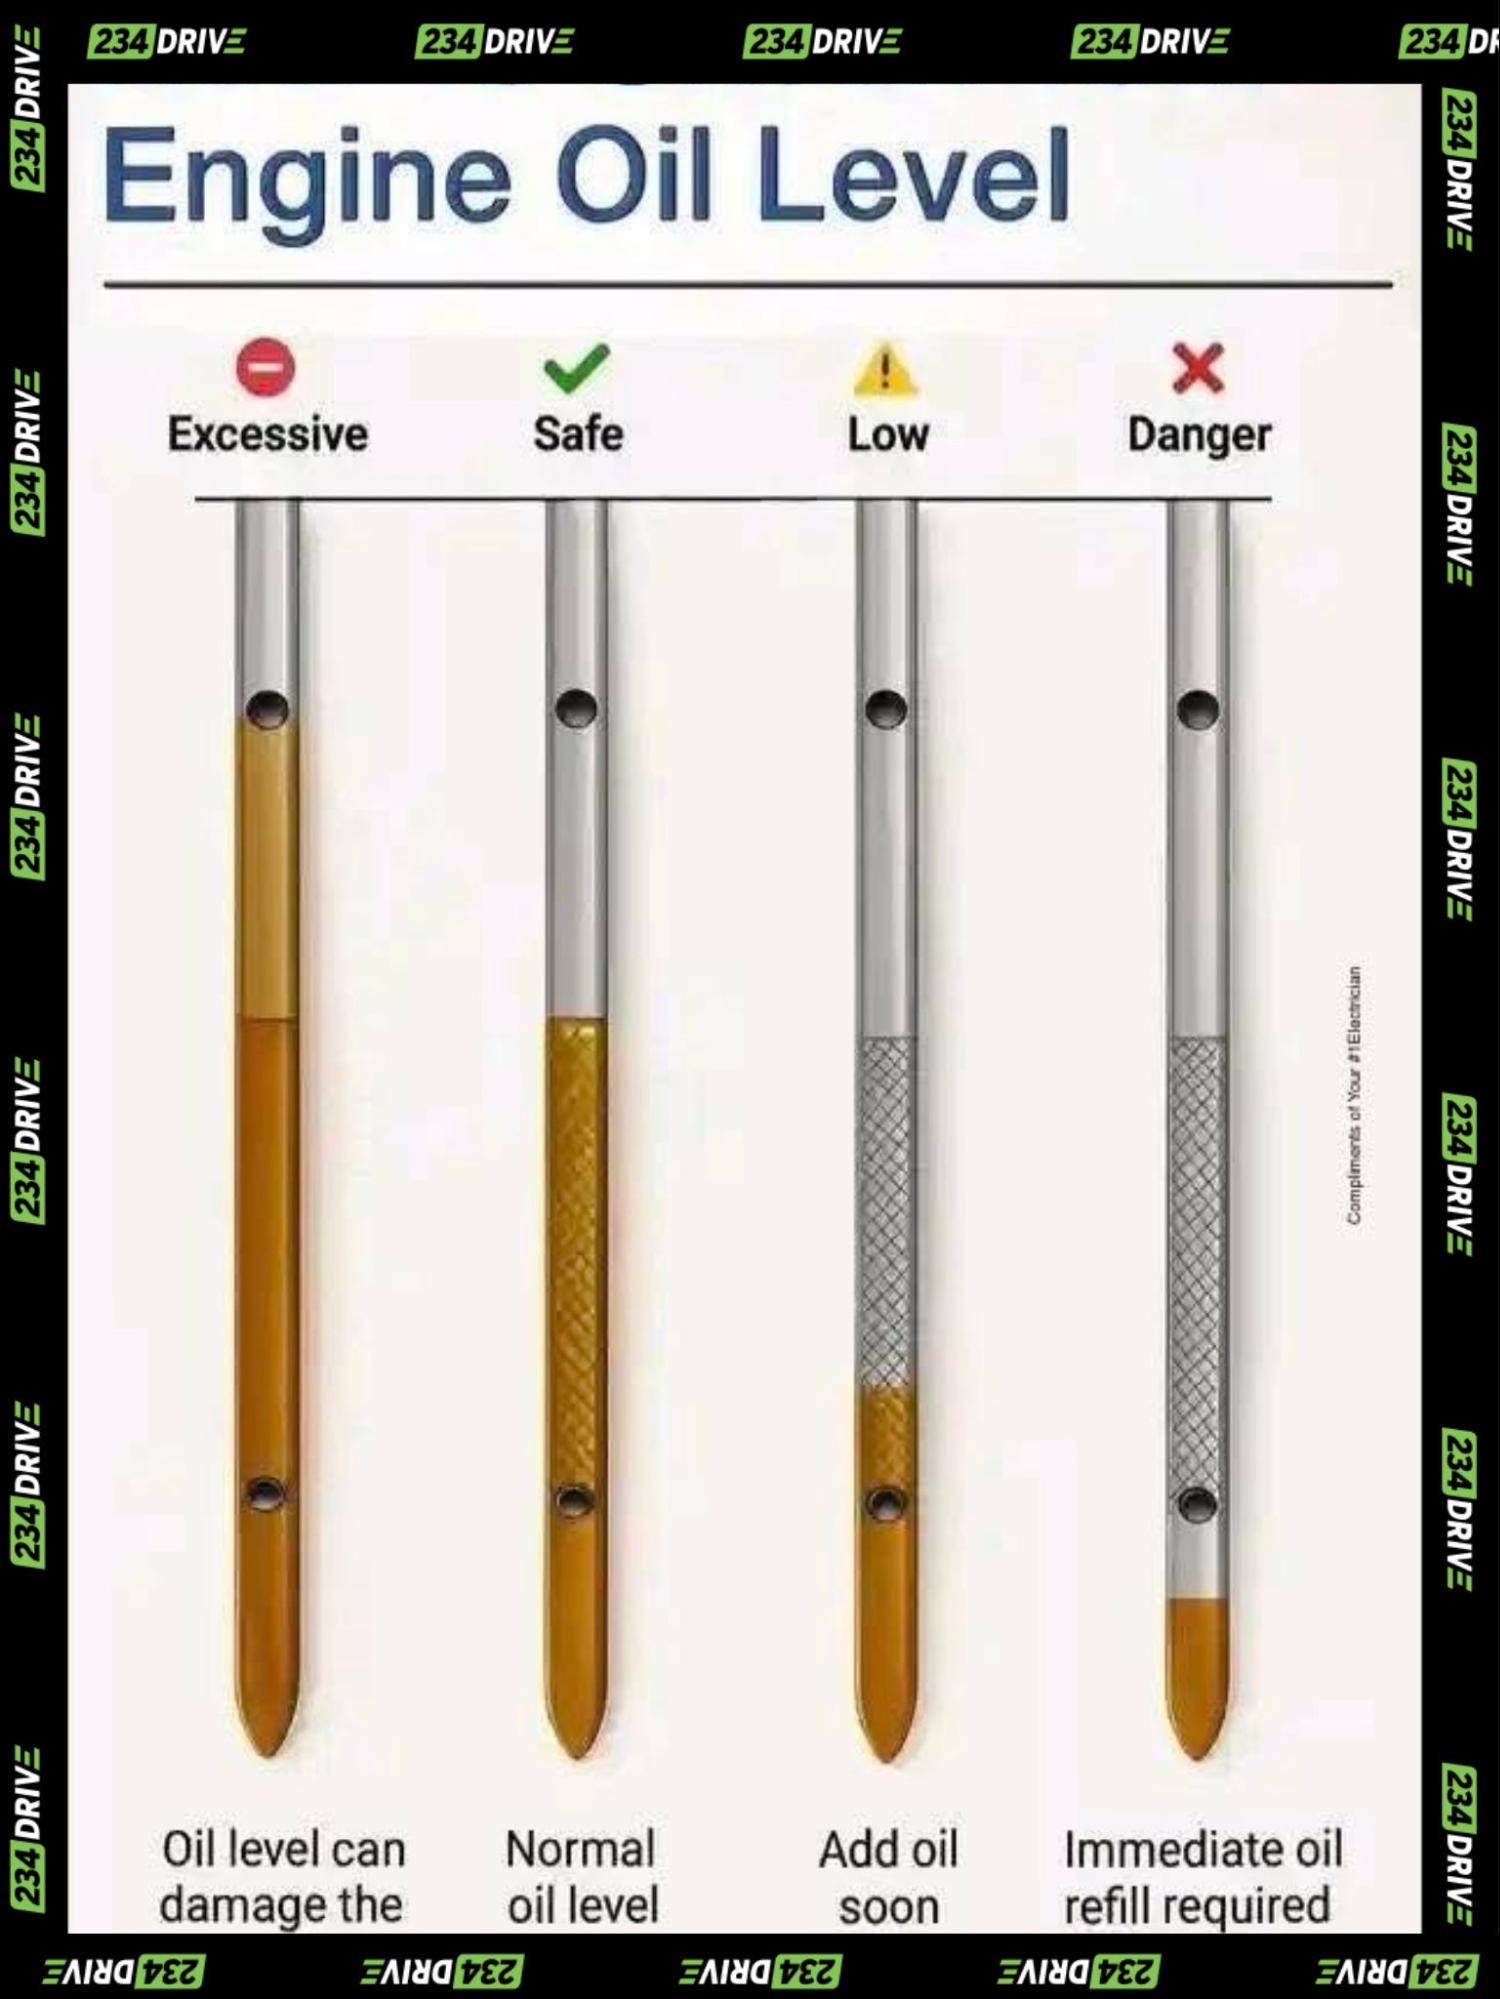
4. Reading the Level
Look for two markings on the end of the stick. They might be lines, pinholes, or letters (L for Low, H for High; MIN for Minimum, MAX for Maximum). There is often a crosshatched area between them.
- Safe Zone: If the oil streak ends between the two marks or within the crosshatching, your level is good.
- Low: If it is below the bottom mark, you need to add oil.
5. Inspect the Condition
Don’t just look at the level; look at the oil itself. Fresh oil is amber or honey-colored. Used oil is dark brown or black—this is normal. However, if it looks milky (like a latte), you may have a coolant leak. If it feels gritty, you have dirt contamination.
Best Practices and Common Questions
When is the Best Time to Check?
There is often debate about checking motor oil levels when the engine is hot versus cold.
- Ideally: Check when the engine is cold (e.g., in the morning) because all the oil has settled in the pan.
- Alternatively: If you are at a gas station, wait at least 5-10 minutes after stopping. This is generally considered the best time to check car oil if you are mid-trip, ensuring you get a reading that isn’t falsely low due to oil still circulating in the engine.
How Often Should I Check?
While modern cars are reliable, experts recommend checking your oil once a month or every other fuel fill-up. This frequency helps you spot leaks or abnormal consumption before they become disasters.
What to Do If Levels Are Off?
If your reading is below the minimum mark, do not panic, but do not ignore it.
- Identify the Oil Type: Check your owner’s manual or the oil filler cap for the correct viscosity (e.g., 5W-30 or 0W-20). Using the wrong oil can affect performance.
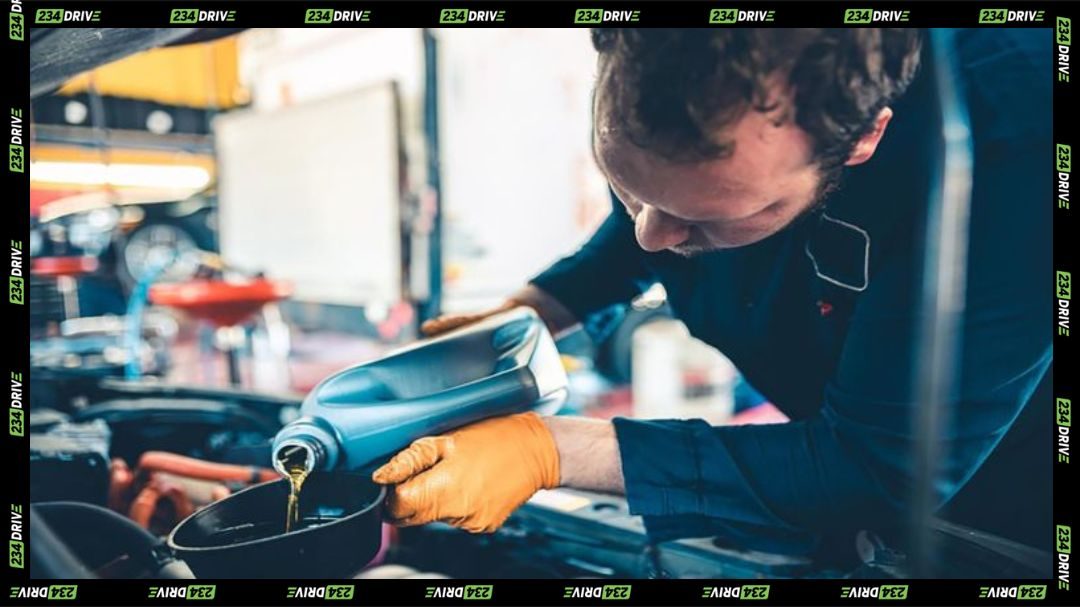
- Add Slowly: Remove the oil filler cap (usually on top of the engine) and use a funnel. Add oil in small increments—about half a quart at a time.
- Recheck: Wait a minute for the oil to drain down, then check the dipstick again. Do not overfill. Overfilling can cause the oil to foam, reducing its lubricating ability and potentially blowing out seals.
Understanding Oil Changes
Checking your oil is not a substitute for changing it. Over time, heat breaks down the additives in the oil, and it becomes saturated with contaminants.
Drivers often ask, “How often should I change my oil?” The answer depends on your oil type:
- Conventional Oil: Typically requires changing every 5,000 to 7,500 miles and is best suited for older vehicles or those used for light, low-stress driving.
- Synthetic Blend: Generally lasts up to 8,000 miles, offering a middle ground that works well for SUVs and vehicles subjected to moderate loads.
- Full Synthetic: Can last between 7,500 and 10,000+ miles (or more), making it the top choice for modern engines and vehicles operating in extreme heat or cold.
Conclusion
Checking your oil takes less than five minutes, costs nothing, and is the single best insurance policy for your engine. By making this simple check a part of your monthly routine, you ensure your vehicle remains reliable, efficient, and ready for whatever road lies ahead.