
There is a specific kind of sinking feeling every car owner knows. You walk out to your car in a sunny parking lot, and there it is: a jagged white line across your door or a web of swirl marks on your hood. Whether it was a stray shopping cart or a low-hanging branch, a scratch feels like a personal affront to your vehicle’s beauty.
But before you rush to the body shop and prepare to drop hundreds of dollars, take a breath. Research suggests that you can fix car scratches right in your driveway for under $50 (₦70,000). In this comprehensive guide, we’ll break down the science of your car’s paint, how to diagnose the damage, the best DIY methods, and when it’s time to call in the professionals.
Understanding the Anatomy of Your Car’s Paint
To fix a scratch, you first need to understand what you’re actually looking at. Modern automotive paint isn’t just one layer of colour; it’s a sophisticated “sandwich” designed for both aesthetics and protection.
- The Primer: This is the bottom layer that bonds the paint to the metal or plastic body of the car. It also provides a level of corrosion resistance.
- The Base Coat: This is where the magic happens—it’s the actual pigment or “colour” of your car.
- The Clear Coat: This is a thick, transparent layer on top. Its job is to protect the colour from UV rays and road debris while providing that glossy “wet” look.
The Golden Rule: If the scratch is only in the clear coat, you can almost always fix it yourself. If you can see metal or a different colour (the primer), you’re looking at a more complex repair. Much like how monitoring fluids is vital for your engine, keeping this protective layer intact is the first step in car gasket maintenance to prevent long-term body corrosion.
How Deep Is Your Scratch?
Before grabbing a bottle of polish, you must perform a “scratch audit.” To correctly identify scratch types, you need to look at the depth of the penetration. Misassessing the damage is the #1 reason DIY repairs fail.
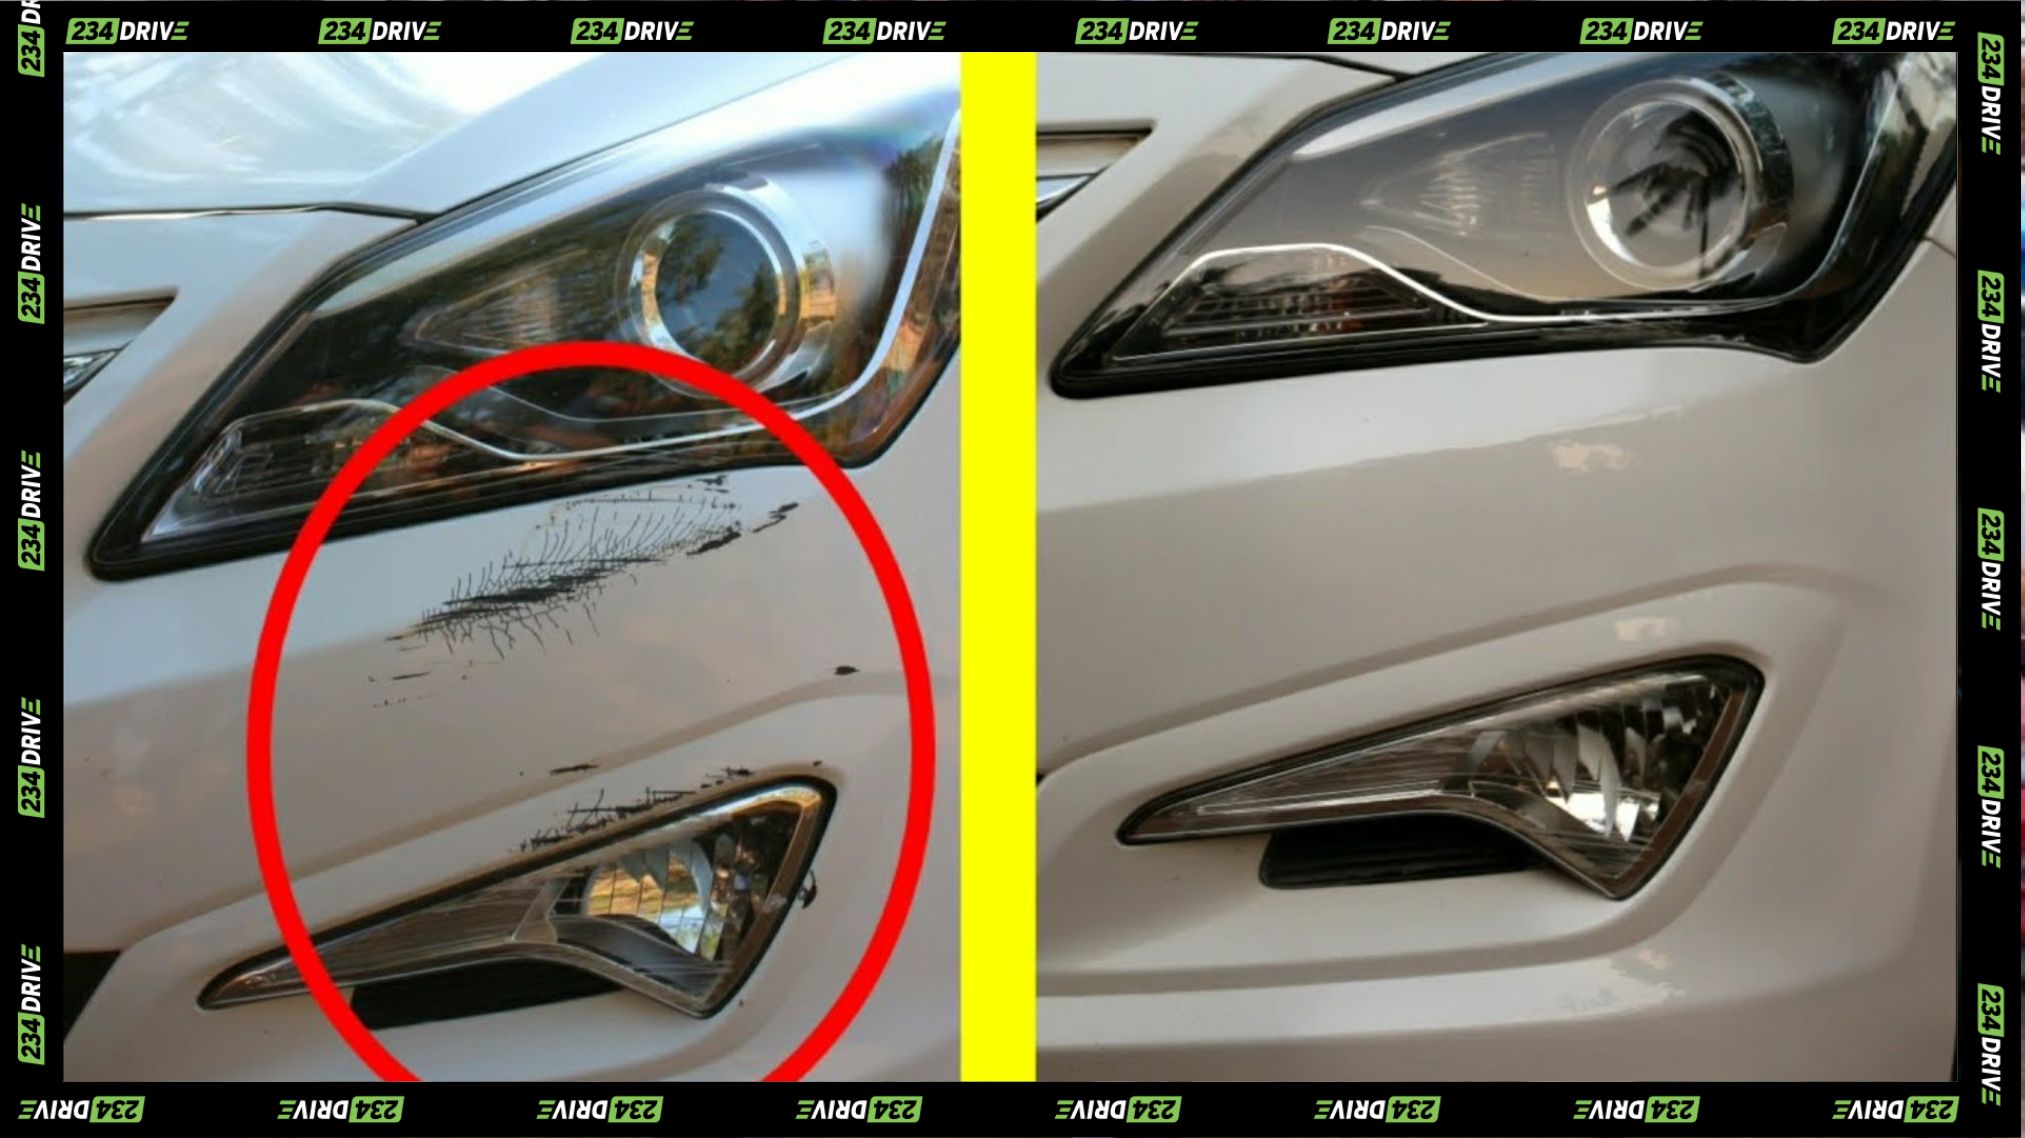
The Fingernail Test
Run your fingernail gently across the scratch.
- Does it glide over? It’s a surface-level clear coat scratch.
- Does it “catch” slightly? You’ve likely hit the base coat.
- Does it drop into a deep groove? You’ve reached the primer or bare metal.
The Wet Test
Spray the area with water. If the scratch seems to “disappear” while wet, it’s a clear sign that the damage is only in the clear coat. If the scratch stays visible while wet, it’s deep.
| Type | Identification | Repair Difficulty |
| Clear Coat | Fingernail doesn’t catch; disappears when wet. | Easy (DIY Polishing) |
| Paint/Base Coat | Fingernail catches; colour appears discoloured. | Moderate (Touch-up paint) |
| Primer/Deep | Metal is visible; deep groove. | Hard (Professional needed) |
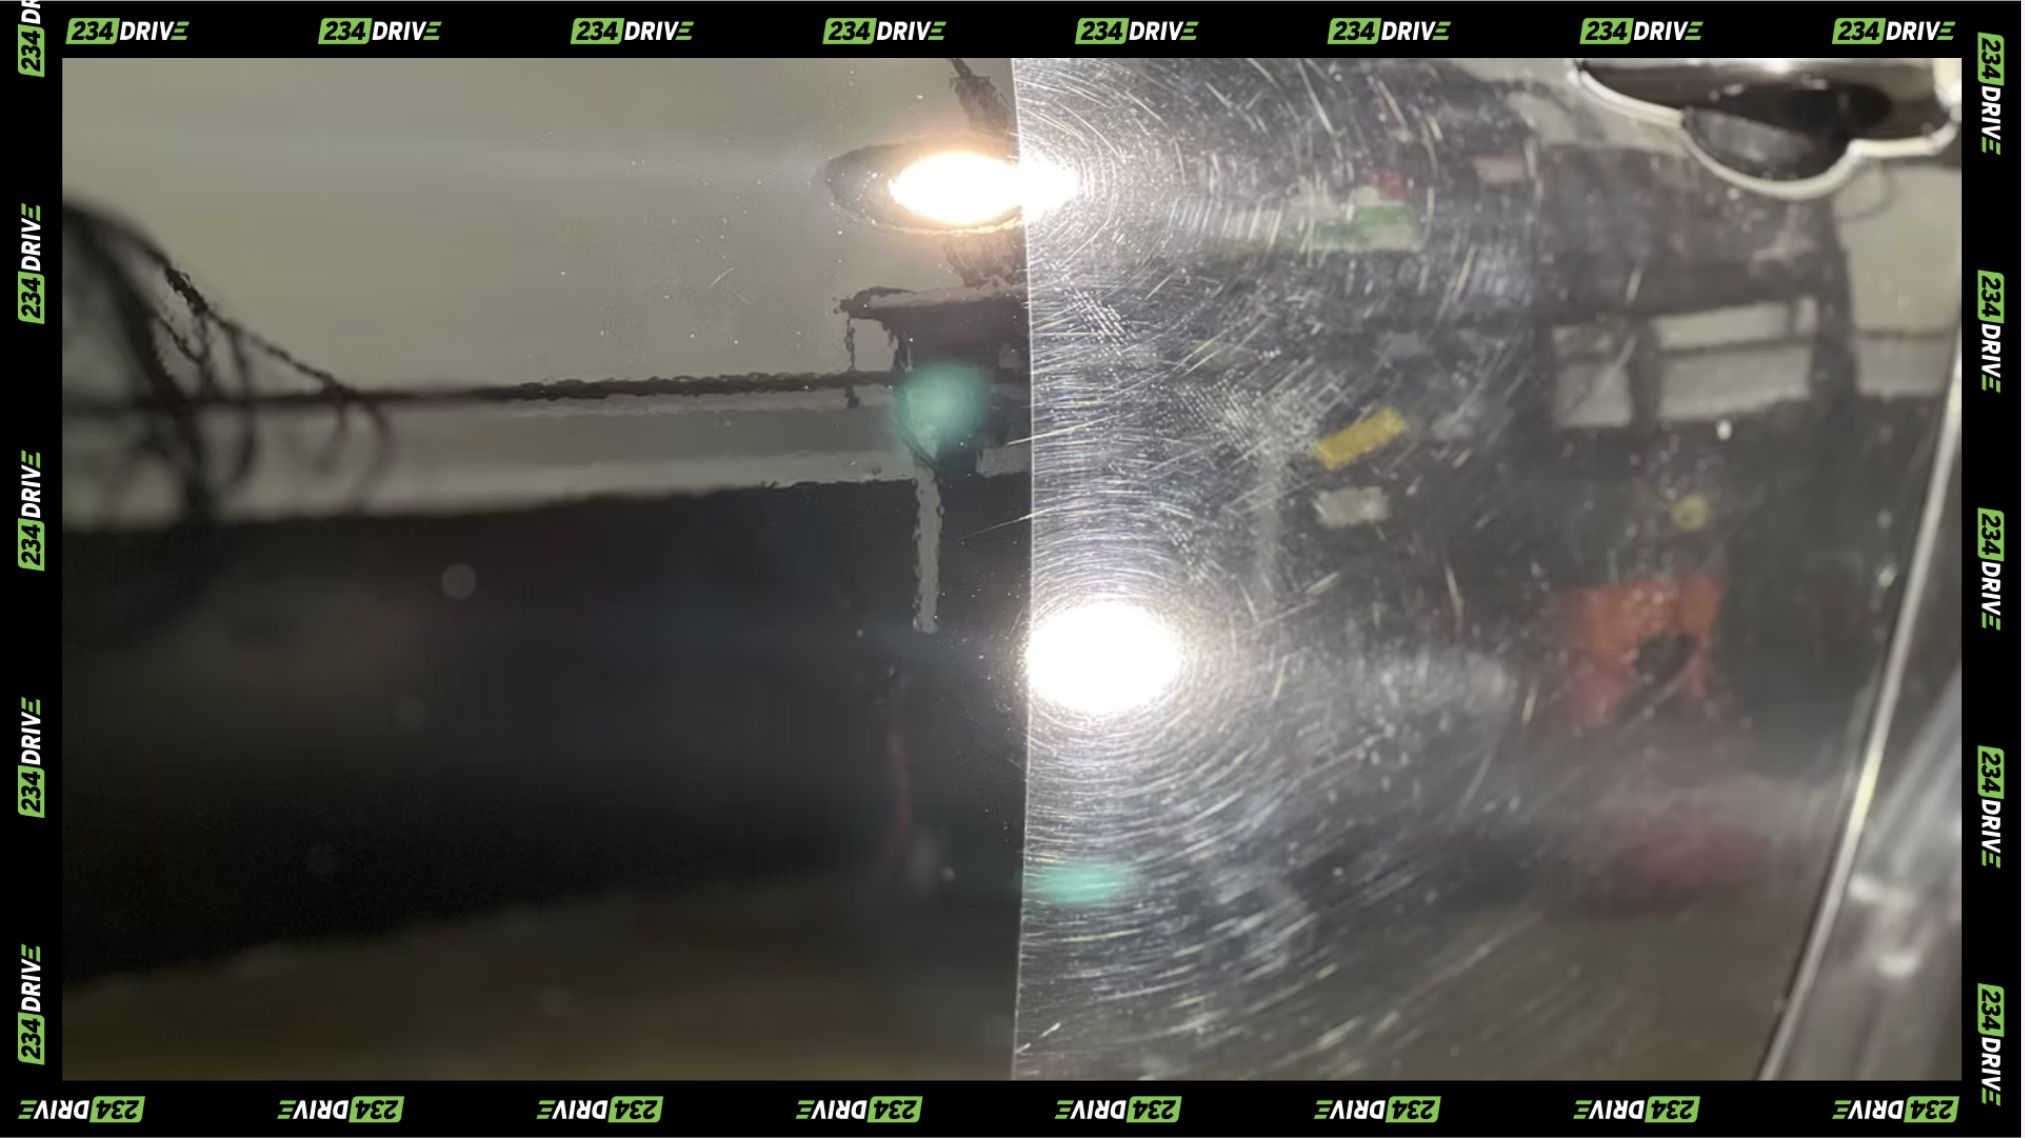
| Swirl Marks | Web-like patterns visible in sunlight. | Easy (Buffing) |
DIY Methods
If your scratch passed the “clear coat” test, you have several options ranging from household items to professional-grade finishes.
The “Home Remedy” Toolbox
- Whitening Toothpaste: Apply a small amount to a microfibre cloth and rub in circular motions. It essentially “sands down” the edges of the clear coat scratch.
- Baking Soda Paste: Mix two parts baking soda with one part water. It acts as a natural, gentle buffing compound.
- Magic Eraser: Use with caution! These act like extremely fine sandpaper and are great for removing paint transfer.
The Professional DIY Step-by-Step
- Clean the Surface: Wash the area with pH-neutral car soap.
- Apply Compound: Put a pea-sized amount of scratch remover on a microfibre pad.
- Work the Area: Rub in firm, overlapping circular motions for about 60 seconds. Do not do this in direct sunlight.
- Buff and Inspect: Wipe the residue away with a clean cloth.
- Protect with Wax: You must apply a fresh layer of wax afterward to restore protection and shine. While you’re under the hood getting your supplies, it’s a great time to check car oil to ensure your vehicle is running as smoothly as it looks.
Best Scratch Removers of 2026: What Actually Works?
Based on independent tests of the best scratch removers, here are the top-rated products for the current year:
- Best Overall: Meguiar’s Scratch Eraser Kit. Includes a specialised pad that attaches to a standard household drill for easy application.
- Best for Deep Scratches: Turtle Wax Premium Scratch Repair Kit. Includes a clear coat pen and various grades of sanding pads.
- Best Budget Option: Formula 1 Scratch Out. A simple, effective liquid for light swirls and oxidised paint.
- Best for Detailers: Chemical Guys VSS. A “one-step” polish that breaks down from a heavy compound into a fine polish.
When to Go Professional
Not every scratch is a DIY candidate. You should head to a body shop if metal is exposed, the scratch covers multiple panels, or you’re dealing with spider-webbing or cracking. Ignoring deep damage can lead to rust, just as ignoring cooling issues can lead to car overheating, both of which result in massive repair bills later.
How to Prevent Future Damage
As the old saying goes, an ounce of prevention is worth a pound of rubbing compound. By following these scratch-free car tips, you can keep your vehicle looking showroom-ready:
- The Two-Bucket Wash Method: Prevents swirl marks caused by dirty sponges.
- Ceramic Coatings: Creates a “sacrificial layer” that is much harder than your factory clear coat.
- Strategic Parking: Parking at the back of the lot can reduce your scratch risk by 50%.
- Regular Waxing: Waxed cars resist scratches 30% better than untreated ones.
Conclusion
Learning how to remove scratches from your car doesn’t have to be a financial disaster. By taking ten minutes to assess the depth and using the right tools, you can maintain your vehicle’s value and aesthetic appeal.
Pro Tip for your next repair: Always check your driver-side door jamb for your car’s specific “Paint Code.” Having that code ensures a 100% colour match for any touch-up work!